Lawn Mower Storage Tips: 7 Things You Must Know

When storing a lawn mower for the winter, there is a wide range of recommendations. Some people go through every step meticulously while others leave their mowers outside in the snow and hope for the best.

When storing a lawn mower for the winter, there is a wide range of recommendations. Some people go through every step meticulously while others leave their mowers outside in the snow and hope for the best. However, one thing is for sure: the most important thing you can do when storing a lawn mower is to tend to the fuel system. Taking this step will dramatically reduce your chances of problems come the warm season.

Now that you’re at it, don’t stop there. No one wants to have to tinker with a broken mower or buy a new one at the start of every season. It is worth it to prepare your lawn mower for winter like you would a car or boat, especially if you have an expensive riding mower.

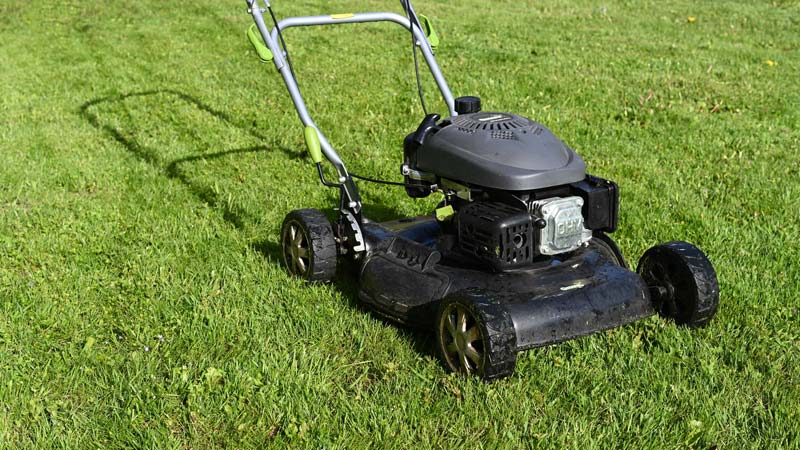
These lawn mower storage steps will help maintain your equipment and increase its longevity. Cover as many steps as you can, and make sure you take all the proper precautions when winterizing your mower.

1. Drain Gas or Add a Fuel Stabilizer

There are two methods for lawn mower storage when it comes to gasoline. You can either leave the gas in the tank and stabilize it, or remove it completely. It is never a good idea to just leave fuel in the tank without any intervention. Fuel can start to degrade in a month or two and can wreak havoc on the carburetor and fuel tank.

How to Remove Gas from a Lawn Mower

In some circumstances, it is essential to remove all the gas from a mower when storing it for the winter. If you are keeping your lawnmower in your basement or inside a storage unit, remove all fuel. Not doing so creates a fire hazard.

To drain gas from a lawn mower, do your best to let the tank run dry toward the end of the season. To accomplish this, run the mower until it stops and won’t restart again. Any remaining fuel can be siphoned out with a turkey baster.

How to Add Fuel Stabilizer to a Lawn Mower

If you are storing the lawn mower in a detached garage or shed, leave a full tank of gas and top it off with a fuel stabilizer. Once the stabilizer is added, run the mower for a couple minutes to be sure the stabilizer gets into the system.

2. Prevent Mower From Kick-Starting

Before you clean your lawn mower and prep it for storage, make sure you remove the spark plug; this will prevent the mower from being turned on accidentally. The importance of this step cannot be underestimated.

3. Drain or Change Oil

It is important to change a lawn mower’s oil at the end of every season, if necessary. The first step is to figure out if you have a two-cylinder or four-cylinder lawn mower. Two cylinder motors have the oil and fuel in the same tank, in which case you can drain the oil along with the fuel. On four-cylinder motors, the oil will need to be changed similarly to how you would on a car. Refer to the lawn mower’s owner manual for specific instructions on how best to do this.

In general, you can follow these steps on most four-cylinder mowers:

  • Check the level of the oil by removing the dipstick.
  • Make sure the oil is warm by running the mower after adding fuel stabilizer or when draining the tank. If you waited for this step and the engine is cold, connect the spark plug temporarily and run the mower for 10-15 minutes.
  • Remove the spark plug again if you reconnected it to warm up the engine. If your mower has a battery, disconnect it.
  • Pull the oil plug and drain the oil into an oil-safe drain pan.
  • Properly discard used oil by bringing it to a recycling facility that can properly dispose of it.
  • Add new oil to the tank according to the manufacturer’s recommendation.

Lawn Mower Storage Pro Tip: If you have inconveniently positioned drain plugs, consider purchasing an oil extractor to help with this process.

4. Clean Deck and Undercarriage

A garden hose or a pressure washer on a low setting will work well to clean the lawn mower’s deck. In theory, grass should be cleaned off after every mow. However, if bits of grass have dried and crusted onto the metal, make sure to remove it before storage. If necessary, take a wire brush, putty knife or a flat head screwdriver to scrape off anything that the hose did not clean.

Be careful of the mower blades and make sure to wear thick, durable gloves during this process. Once the undercarriage is clean and dry, use a silicone spray to prevent future build-up and better preserve the lawn mower.

5. Remove and Sharpen Blade

To remove the blade, lean your mower on its side with the carburetor facing up. Find a long-handled wrench that matches the bolt holding the blade in place. If the bolt is stuck in place and corroded, spray some oil or lubricant on it and let it sit for a few minutes.

Once removed, sharpen each blade evenly. You do not want to make the mistake of sharpening only one section because this could lead to an uneven lawn. To do this, clamp the blade in a vise and use a mill bastard file to file down the blade until it is as sharp as a butter knife.

Lawn Mower Storage Pro Tip: Once you remove the blade, mark it with a paint pen, so you know which is the top and which is the bottom. One common mistake people make is to reinstall the blades upside down.

6. Replace Spark Plug and Air Filter

At this point, the spark plug should already be disconnected. Use a wrench or pliers to completely remove the plug. Take the plug with you to the store to make sure you purchase the correct replacement. Next, screw in the new plug and either reconnect the wire or leave it disconnected for storage.

Before storing a lawn mower for the winter, you will want to either clean or replace the air filter. Some lawn mower filters are made of paper and should always be replaced when they look dirty. Other filters like foam or plastic filters can be cleaned, dried and then coated with a few tablespoons of oil before being reinstalled. While you are at it, use a spray lubricant to coat any exposed lawn mower components.

7. Keep Mower Covered In Storage

To protect the exterior and interior components, consider investing in a lawn mower cover. If you don’t have a cover readily accessible, you can use a tarp.

We hope this article puts you off to a good start so you know what to expect when you store your lawn mower. Whenever possible, make sure to reference the owner’s manual. If you don’t have a copy, most times the manufacturer will have a copy online that you can download.

We offer storage solutions to our clients across Greater Vancouver,Vancouver Island and the Fraser Valley with storage units in Chilliwack (Chilliwack U-Lock Mini Storage), South Surrey and White Rock (White Rock U-Lock Mini Storage), Burnaby and Vancouver (Burnaby U-Lock Mini Storage), Victoria (Victoria U-Lock Mini Storage), Nanaimo (Nanaimo U-Lock Mini Storage) and Parksville (Parksville U-Lock Mini Storage). 
Please contact a U-Lock Mini Storage self-storage facility near you to inquire about our storage units and our team members will be delighted to answer any questions you have!

10 Things You Shouldn’t Store In a Garage

want to store items in your garage that you don’t have room for in your house, you could be in for a surprise later. Moisture, heat and pests can damage or destroy your belongings. In fact, some of those items could even become dangerous when stored improperly.

If you want to store items in your garage that you don’t have room for in your house, you could be in for a surprise later. Moisture, heat and pests can damage or destroy your belongings. In fact, some of those items could even become dangerous when stored improperly.

Before you stash another box or unused item in your garage, make sure it’s safe to do so. We compiled this list of 10 things that should never be stored in a garage.

These items should never be stored in your garage:

Food

You should never store food of any kind in your garage. Fresh food attracts rats and other pests, which can easily break into bags and cardboard boxes. Canned goods don’t fare much better. Temperature fluctuations can cause bacteria to grow inside cans, and humidity can cause the cans’ metal and the metal lids on glass jars to rust. In turn, the rust can cause a chemical reaction in the food that makes it unfit for consumption.

Alcohol

Beer, wine and other alcoholic beverages shouldn’t be stored in the garage either. Light and heat can alter their taste and even turn wine into vinegar. Instead, make room for them in a dark, cool place inside your home.

Paint cans

You’re not alone if you store leftover paint in your garage. However, the extreme temperatures of your garage, basement or attic can ruin your paint, rendering it useless. To keep your paint at its best, store it in a utility closet or laundry room.

Propane

Since propane tanks can leak, they’re a potential hazard when kept in your garage. Just one spark can start a fire when a leaking propane tank is present. Store propane tanks in a well-ventilated area a safe distance from your home.

Firewood

Pests like spiders and termites make their home in piles of stacked wood. If that wood is stored your garage, those pests can easily infiltrate your living space. Avoid an infestation by storing firewood at least 20 feet away from your home.

Pet food

Like human food, pet food shouldn be kept anywhere but in your garage. Although temperature won’t affect pet food the same way it does your food, rats and other pests can easily chew through pet food bags. If you must store it in the garage, keep it in a tightly sealed plastic or metal container.

Plywood

Who doesn’t store wood scraps in their garage? For an immediate project, it’s usually not a problem. But over the long term, wood can warp thanks to fluctuating temperatures and humidity. If you have nowhere else to store your scraps, the garage works. Just realize the wood may warp and become unusable by the time you need it.

Wooden furniture

It’s not just plywood that suffers in the garage. Pretty much any wood is susceptible to its harsh conditions. As a result, if you store wood furniture in your garage, expect some damage to it over time. For example, changes in the humidity will cause the wood to swell and contract, leading to cracks that you may not be able to repair.

Collectibles

Valuables don’t belong in the garage. Moisture can cause coins to tarnish, Hot Wheels to rust and trading cards to mold. Heat can cause vinyl records to warp, and dirt can mar autographed posters. Not to mention, it’s easier to steal these items from your garage than a secure place inside your home.

Electronics

Old electronics like computers, laptops, DVD players, game consoles and TVs can easily be damaged by extreme temperatures, with moisture posing the greatest risk. Any condensation or moisture can cause electrocution. Either keep these items inside or donate them.

We recommend renting a storage unit for your storage needs. Storage units at self storage facilities such as U-Lock Mini Storage offer secure, climate-friendly, and pest-free storage solutions. Our storage units are suitable for storing goods both for the short and the long-term.

We offer storage solutions to our clients across Greater Vancouver, Vancouver Island and the Fraser Valley, with storage units in Chilliwack (Chilliwack U-Lock Mini Storage), South Surrey and White Rock (White Rock U-Lock Mini Storage), Burnaby and Vancouver (Burnaby U-Lock Mini Storage), Victoria (Victoria U-Lock Mini Storage), Nanaimo (Nanaimo U-Lock Mini Storage) and Parksville (Parksville U-Lock Mini Storage). 
Please contact a U-Lock Mini Storage self-storage facility near you to inquire about our storage units and our team members will be delighted to answer any questions you have!

8 Important Tips for Packing to Study Abroad

​You’ve been invited to study abroad for a semester, or even a full year. So, what do you need to bring? What don’t you need? And, how do you get it all there?

​You’ve been invited to study abroad for a semester, or even a full year. So, what do you need to bring? What don’t you need? And, how do you get it all there?

We’ve compiled these eight tips to help you prepare for studying abroad.

Bring the Right Documents

To get into the country where you’ll be studying, you need a passport. If you don’t already have one, give yourself at least eight weeks to get one (you can expedite your passport for a fee). Your passport will remain valid for 10 years and come in handy if you intend to visit neighbouring countries during your time overseas. 

Some countries also require a visa: a document allowing you to stay in that country for a specified amount of time. Check to see if your destination country requires one, and apply early.

You will also want to bring your International Student Card (ISC), which entitles you to discounts at restaurants, shops and more overseas, and carries medical and emergency benefits. The ISC card can also serve as an additional form of identification when you study abroad. If you don’t get one, consider applying for a proof of age card instead. 

Additionally, you will likely need an International Certificate of Vaccination (ICV). Some countries required these even before COVID to prove you had received vaccinations for diseases like polio, malaria, meningitis or yellow fever. Today, you may have to present one proving you’ve been vaccinated for COVID as well.

Always bring your documents with you on the plane – not packed in your luggage. Never ship them. Make several copies to have on hand.

Know the Country

Weather plays a big factor in what you pack, too. Depending on when you go and where you go, you may experience one season or several. Winter usually means bulky jackets, gloves, scarves, hats and boots, which can take up a lot of room in your suitcases. Some airlines will allow you to ship boxes as checked luggage, so you could theoretically pack a box of winter clothes.

Before you start packing for your move to study abroad, study the country you’ll call home. Its climate, culture, geography and recreational opportunities can inform what you pack. For example, the tank top you can wear in London would offend people in Dubai. Also, consider how convenient amenities at your destination will be. Will you be able to buy toiletries at a nearby store, or will you have to commute via public transportation for several hours to reach the closest grocery store to purchase toiletries?

Pack the Right Clothes to Study Abroad

Based on what you learn about the country, pack clothes suitable for your time studying and your time exploring the country. As a starting point, you’ll want to bring:

  • Shirts, pants, dresses, skirts and everyday clothes
  • Underwear, socks and undergarments
  • At least one nice, dressier outfit
  • Pajamas and comfy clothes
  • Bathing suit
  • Exercise clothes for working out, hiking and adventures
  • Light jacket

Bring Suitable Footwear

Your destination may have different terrains than where you live now so make sure to bring suitable footwear. Keep your selections simple and stick to these tried-and-true options:

  • Comfortable shoes for walking
  • Athletic shoes or trail shoes for hiking and outdoor adventures
  • One pair of nice shoes (choose wedges over stilettos)
  • Flip flops for hostel showers or the beach
  • Slippers (or gripper socks) for colder climates

Add Toiletries and Other Necessities

Once you’ve decided on your clothes and footwear, finish your packing by adding toiletries to your luggage:

  • Shampoo, conditioner and soap
  • Toothbrush, toothpaste and floss
  • Contact lenses, solution and eyewear
  • Deodorant
  • Cosmetics
  • Sunscreen
  • Feminine products
  • Contraceptives

The whole point of studying abroad is to learn, in the classroom and beyond. Pack for both. You will also want to bring:

  • Laptop, charger and supplies
  • Mobile device (cell phone) and tablet
  • Pen, pencils and school supplies
  • Camera, if you enjoy photography
  • Journal to record your experiences
  • Paper map, in case you can’t rely on cell service
  • Small backpack for day trips
  • Padlock for hostel lockers

Don’t Overpack to Study Abroad

Most international flights allow at least one, sometimes two checked bags. Depending on the airline and destination, you may be able to check additional bags (or boxes) for a fee. However, keep in mind that whatever bags you bring, you have to get them to and from the airport.

Try to keep your luggage limited to two large, checked suitcases for your clothes, toiletries, favorite products and other necessities. In your carry-on, bring your electronics (laptops, tablets, etc.), chargers, essential gear and any prescriptions. You may also want to pack a fresh t-shirt and a toothbrush for long flights.

After you arrive, if you find you need more clothes or left things at home, your parents can send you a care package through a carrier.

Rent a storage unit

If you do end up bringing more than you need and you don’t have enough storage space at the place that you live, you can rent a storage unit to store excess items. For example, you can store shoes or coats that you won’t wear regularly in a self storage unit.

Bring Your Favorite Products

If you can’t survive without your favorite products, like a snack or brand of soap, then by all means pack a few packages in your luggage. One or two items that remind you of home may help you cope as you adjust to a new country. Don’t get carried away, though: your parents and friends can always send these items in a care package later.

We offer storage solutions to our clients across Greater Vancouver,Vancouver Island and the Fraser Valley with storage units in Chilliwack (Chilliwack U-Lock Mini Storage), South Surrey and White Rock (White Rock U-Lock Mini Storage), Burnaby and Vancouver (Burnaby U-Lock Mini Storage), Victoria (Victoria U-Lock Mini Storage), Nanaimo (Nanaimo U-Lock Mini Storage) and Parksville (Parksville U-Lock Mini Storage). 
Please contact a U-Lock Mini Storage self-storage facility near you to inquire about our storage units and our team members will be delighted to answer any questions you have!