5 Ways to Keep Your Kids’ Washroom Clean

We all know how a kid’s bathroom can go from neat-as-a-pin to a complete disaster in less time than it takes to fold a stack of towels. When you have children in the bathroom, some innovative organizing and design tips can help save you time when it comes to keeping things tidy. Here are 6 organizing tips to try out in your child’s bathroom.

We all know how a kid’s bathroom can go from neat-as-a-pin to a complete disaster in less time than it takes to fold a stack of towels. When you have children in the bathroom, some innovative organizing and design tips can help save you time when it comes to keeping things tidy. Here are 6 organizing tips to try out in your child’s bathroom.

1. Labeled hooks for towels

Wet towels on the floor are the bane of many parents’ existence. This can be exacerbated  when the bathroom is used by multiple kids.

Ginger Bowie of Ginger Snap Crafts suggests replacing door hooks or towel bars with a hat rack; choose an oversized rack with six or more hooks for more versatility.

If you’d prefer to go with classic hooks, consider painting the name of each child – or better yet – place a picture of them, above their hook. This will prevent arguments (”Who used my towel!?”) and help you keep track of them for laundry day. Plus, how cute would it be to have photos of your favorite littles all in a row?

2. Corral dirty clothes with a bathroom hamper or bin

If you don’t have a laundry chute, you probably keep hampers in each family members’ bedroom. But dirty clothes are likely to accumulate in the bathroom as well. Placing a hamper in the bathroom will give your kids an easy dump zone for soiled clothing.

Plastic hamper bins are perfect for wet clothes after an afternoon at the pool or muddy clothing from playing in the rain. Even better, you can easily carry the bin to the laundry room or even rinse it out in the tub.

3. Keep cleaning supplies close

Your children’s bathroom probably needs cleaning about twice as often as your own. Save yourself some time by making space for your cleaning supplies right in the bathroom. A small caddy works perfectly and often fits under the sink.

And if your kids are old enough to be a part of the clean-up crew, consider including a checklist with the cleaning supplies. That way, they have no excuse for forgetting to clean the toilet bowl or the mirror.

4. Come up with a code or system for toiletries used daily

According to Becky Mansfield of Your Modern Family, one of the most effective things you can do to help the kids keep their own bathroom organized is to set up daily use kits  for each child. Fill the kits with each child’s toiletries—deodorant, makeup, hair supplies, or whatever else they might need. This is particularly helpful as the kids get older.

Store the kits out of sight in a linen closet or drawer. If you don’t have the space to hide them, a shelf works just as well. And when it comes time for a move or remodel, your children’s belongings will be ready to go! Just throw the kits together to keep them easily accessible during the transition.

For an added degree of organization, you can color code everything. Each child gets a color. Their  kit, toothbrush, hairbrush—even towels—can be the same color, making it easy to find the owner of any item in the bathroom. Color coding also makes packing a snap, whether you are packing for one night or for a move.

5. Add storage to a small bathroom with corner shelving units

Very small bathrooms can benefit from corner shelving units. Many of these are quite narrow, providing just enough space to store extra toiletries or linens. This is a great solution for houses with kids of multiple ages—the lower shelves are perfect for the youngest kids while the older ones can easily access the higher shelves. You can also rent a storage unit to store your bathroom belongings.

11 Tips for Spring Cleaning 2022

his an annual ritual or you’re attempting to tackle the process of spring cleaning for the first time, we hope these tips inspire you to create a home you love.

When life gives you lemons, make lemonade. If you’ve been forced indoors by Coronavirus, you’ve been given the gift of time. Pair it with these spring cleaning tips, and you have what it takes to make home a place you’ll never want to leave, even after shelter-in-place orders have been lifted!

We’ve rounded up our favorite spring cleaning tips, plus a tried and true process to get you started. Whether you’re part of the 75% of people that make this an annual ritual or you’re attempting to tackle the process of spring cleaning for the first time, we hope these tips inspire you to create a home you love.

1. Start by breaking out the warm weather equipment

Isn’t it exciting to pull out these reminders of the fun to come this summer? Pull them out and hose them down.

  • Grills
  • Lawnmowers
  • Sports equipment
  • Patio furniture

2. Put away winter

Now that you’ve pulled out your warm weather equipment, you’ve made room to stow away cold weather items. Here are some things you can happily store away in a basement, attic or storage unit until next fall:

  • Heavy outerwear
  • Winter boots
  • Snowblowers
  • Shovels
  • Winter sports gear

3. Switch out linens with lighter fabrics and colors

Say hello to spring indoors, too. Put away the heavy bedding, fuzzy throws and velvet pillows to help rid your home of the winter feel. Change up your curtains in favor of a lighter, sheer material to let in more light. Add some plants, mirrors and lighter wall decor to create an open, airy feel for your family and your guests. You’ll immediately feel less cluttered.

4. Switch out your wardrobe

Did you know the average person only wears 20% of the clothes in their closet on a regular basis? If you come across clothing that you haven’t worn in the last 6-12 months, it’s time to get rid of it! Consider donating these clothes to a local Goodwill.

Besides downsizing your wardrobe to make outfit decisions easier, you can take this time to pack up your fuzzy sweaters and bring out the shorts. Here’s a guide to storing winter clothing in the warmer months.

5. Skip the sentimentals

If time is limited for your spring cleaning process, we recommend skipping sentimental items until you can dedicate time to really go through them. After surveying 2,000 Americans on the stuff they store and why, we learned that sentimental connections to our belongings make the decluttering process much more difficult.

6. Dust before vacuuming

In case your mother never taught you this nugget of wisdom, we thought we’d include it in here. You stir up dust as you try to remove it and it will most likely settle on the ground. You can take care of it after dusting by vacuuming (or sweeping).

Baseboards and ceiling fans are two areas that often get neglected when it comes to dusting. They are also areas that collect a disturbing amount of dust. So don’t forget to add them to your spring cleaning list!

7. Don’t forget the windows

Over the long winter months, debris like pollen, dirt and dust can build up along your window sills. Cleaning the interior and exterior on a routine basis will not only let more light into your home but ensure that your windows easily open and close. Fresh air will also reduce allergens and germs in mattresses, even if you can’t haul them outside.

8. Even furniture can use a spring refresh

Just because you don’t see stains doesn’t mean your couch is free of dust, crumbs, dirt, animal fur or allergens. Many hardware stores, including major chains like Lowe’s and Home Depot, rent upholstery cleaning machines, which can help clean your favorite room in a matter of minutes. At the very least, be sure to vacuum upholstered surfaces.

9. Extend the lifetime of your mattress by cleaning and flipping it

Despite linens and mattress pads, mattresses are still popular places for dead skin cells, sweat and dust. First, take a vacuum over both sides of your mattress to collect any dust or debris. If it’s nice enough outside, the best remedy for your mattress is some fresh air and sunlight.

To spot clean a mattress, mix the following ingredients in a spray bottle:

  • 16 oz. hydrogen peroxide
  • 2 tablespoons baking soda
  • 2 drops of dish soap
  • Soak the stained area with the mixture, and let it sit for 30-60 minutes before pressing it off with a clean towel. This solution has been magical for my children’s mattresses!

While you’re flipping your mattress, do yourself a favor and leave it on the opposite side. Over time, pressure leads to irregular wear. Flipping it twice a year can help keep it in tip-top shape while also making sure it’s clean.

10. Wipe down lightbulbs

It may seem like overkill, but it’s really so simple to do. Dirty light bulbs emit 20 percent less light than clean ones. Brighten up your home by giving your lightbulbs a wipe with a damp microfiber cloth. I bet it will take you only five minutes to wipe each bulb in your home. Need to keep a kid busy during quarantine? This is an easy job for any kid elementary-age and up!

11. Use salt and grapefruit to remove grime from showers and tubs

The grit of the salt plus the acid of the grapefruit cut down on elbow grease needed. It’ll also give your bathroom that extra boost of freshness that is usually only obtained with heavily scented candles and not-so-friendly cleaning products.

9 Tips for Organizing Your Kitchen To Maximize Space

Here are our top nine kitchen organization tips to try today.

“Everything in its place and a place for everything” isn’t just a saying Grandma cross-stitched on a pillow. It’s also the best of the kitchen organization tips you can apply. For most people, though, an organized kitchen is a dream to be achieved someday after retirement when the kids have moved out and life is less hectic. Reversing years of bad organization habits seems like too daunting a task to ever really tackle.

But it is possible to keep the heart of your home clear of clutter without spending weeks on boring cleaning projects. It’s time to stop procrastinating, be honest about what you really need, and reclaim the space you use to cook meals and enjoy time with family and friends. Here are our top nine kitchen organization tips to try today.

1. Start by reflecting on how your family uses the kitchen

Today’s kitchen isn’t just for food storage and cooking. It’s often part of your living area and is a multi-purpose space.

Consider all the functions your space serves. You might have a sitting area off the kitchen that comes in handy for entertaining. Does part of your kitchen end up being used as a workspace? Write down the ways that you use the area to ensure that your kitchen organization accommodates the needs of your family.

Here are some common uses for kitchens to think about:

  • Create a place to store items used when entertaining. From a bottle opener and wine glasses to coasters and serving trays, select an accessible spot for your things so it’s easy to welcome friends and family.
  • If your dining area is combined with your kitchen, keep placemats and napkins in an easy to reach spot so little hands can help set the table while you cook.
  • If your kitchen island is often turned into a game area or homework zone, keep favorite games in a nearby cabinet or have a bin with pencils, pens, and notebooks easy to grab.

2. Think like a minimalist

Your first step toward kitchen freedom is to give the whole space an objective assessment. Forget about any sentimentality attached to the items you’ve kept all these years, and give serious thought to what you actually use on a regular basis.

Take a cue from minimalists, people who do their best not to acquire more than they need and to get rid of anything lacking a clear purpose. Apply this logic to your kitchen by:

  • Setting aside your most-used tools and appliances.
  • Identifying duplicates.
  • Determining which single-function items can be replaced or tossed.
  • Throwing out old, broken, rusty, or hopelessly dirty items.
  • This gives you a starting point to work from as you create a plan of attack to organize your kitchen space.

3. Emphasize ease of use

Every kitchen has a few key items used to prepare and eat meals on a regular basis. Put the items you use most in easy-to-reach places to keep from tossing everything out of the way to get to that one bowl you need. Remember the old rule: “Like goes with like,” a key philosophy when it comes to storage units.

Make it as easy as possible to find your favorite items by storing dishes in one place and cups in another, and putting similar preparation tools together. This not only speeds up meal prep and table setting but also streamlines the appearance of your kitchen.

4. De-Clutter drawer space

As you’re rearranging the items you use most to keep the kitchen organized, you’ll inevitably run across clutter in drawers, including the ubiquitous “junk drawer.” Take the opportunity to clear out the messes you find as part of your overall cleaning strategy.

If you need to pop out to the store to grab some inexpensive drawer organizers, do it. These simple plastic or wooden inserts can turn even the messiest drawer into a neat and tidy space. Get one for silverware and another for everyday items such as tape, twist ties, and rubber bands.

Some utensils take up too much space when stored in drawers. Big items such as ladles and potato mashers are better kept on a mounted wall rack or simple suction hangers stuck to the side of a cabinet.

5. Categorize cabinets for better kitchen organization

Keeping with the “like goes with like” rule, move on from the drawers to the cabinets. Pick logical spots for plates, glasses, and mugs, and place all the similar items together. Organizing in this way will unearth some things you haven’t seen in years. If you find something you have little or no memory of using, ask yourself these questions:

  • Do you really need or even want promotional items from companies you rarely do business with?
  • Will you ever use “kiddie” dishes and cups again?
  • Is there any reason to keep lids with no matching pots?
  • Which items can be donated or given away to clear out more cabinet space?

This keeps you in the minimalist mindset and allows you to let go of items you have no reason to keep without the nagging feeling that you might use them at some unforeseeable time in the future.

6. Power up your shelving

Now that you’ve sorted through most of the overwhelming volume of stuff in the kitchen, you should have a good idea of what items you’re going to keep. It’s time to turn your attention to the shelves and see how best to organize this space in your kitchen.

Open shelving creates a sense of light and space and gives you a place to showcase your everyday dishes when not in use. Mix in decorative, functional items like cookbooks, gourmet olive oils, and flowers for an attractive display. Make sure you give these shelves a good wipe-down at least once a month to address dust, grease, and grime.

If you don’t have the space for an open shelf unit, make an effort to empty space on the shelves you do have. Use decorative plates, potted plants, or small appliances to break up larger groups of items and improve the appearance.

7. Make the most of your storage

If your kitchen has deep storage drawers, roll-out shelves, or a swing-out pantry, organizing your kitchen will be a breeze. But don’t panic if your kitchen is not outfitted with these great storage hacks. You can easily find perfect kitchen organization solutions that will help make life easier.

Shelf inserts can be used to create additional storage space, cookware organizers make it easy to grab the pan you need, and a tiered organizer helps keep things visible and organized.

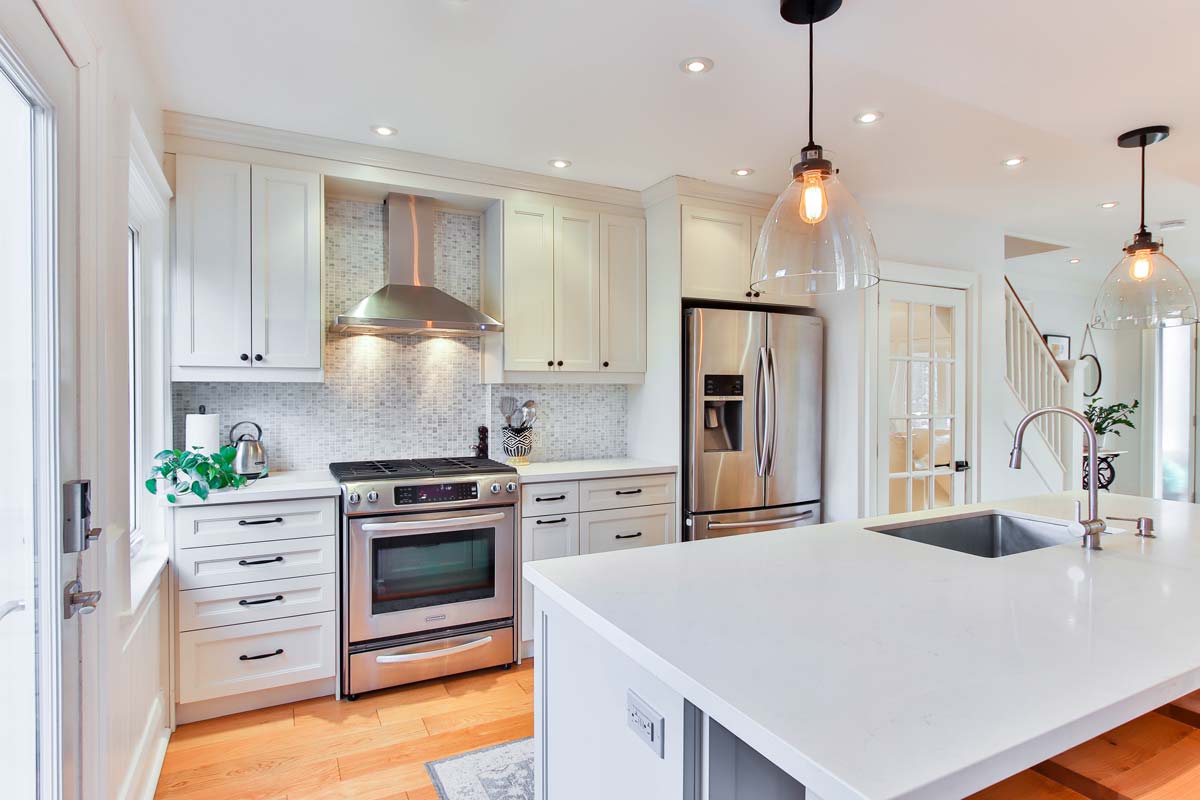
8. Consider the countertops

Your countertop can make a big difference in the way you feel about your kitchen. Clutter-free counters make preparing food and cooking meals easier, and they reduce the possibility of accidents. They also improve the visual appeal of the space.

These kitchen organization tips can help you tidy your counter space:

  • Clean up the sink and counter as soon as possible after preparing food.
  • Store containers of flour, sugar, and other dry goods in cabinets or the pantry.
  • Consider moving knives out of large wooden blocks and into drawers.
  • Put away small appliances, such as the toaster, when not in use.
  • If you don’t have the option of putting everything out of sight, consider mounting as many things off the counter as you can. By mounting things off the counter, the area still appears less cluttered and gives you more space to work when cooking.

9. Make a seasonal storage plan

You don’t need the cookie jar you only use for one month around Christmas cluttering your in-home storage space all year long. Get it out of the kitchen along with those holiday dish towels and fancy serving platters and into a shed or self-storage unit. Keep an eye out for other holiday-specific items, such as cookie presses or candy molds, and store them somewhere else until you actually need them.

When the holidays roll around, get what you need out of storage and wash it thoroughly. Find a good temporary spot for it in the kitchen, and put it back into storage as soon as you no longer need it. Leaving seasonal items out for too long can start the cycle of clutter all over again.