6 Tips for Nursery Room Storage in Small Spaces

Creating nursery room storage in a small space can be challenging for new parents. Babies may be little, but they require a surprising amount of stuff! From diapers and wipes to tiny clothes and toys, keeping everything organized in a compact nursery can feel overwhelming. Fortunately, with the right strategies, you can maximize your storage space efficiently.

  1. Choose Multi-Functional Furniture

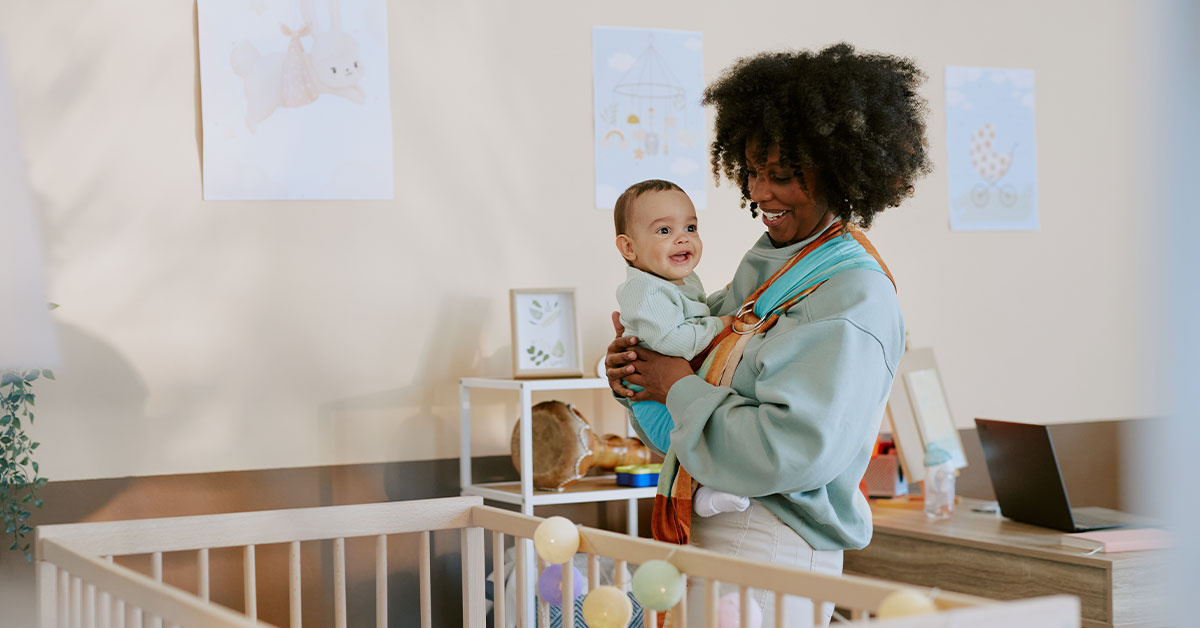
The crib and changing table take up the most room in a nursery, so consider options that serve multiple purposes. A crib with a built-in changing table can eliminate the need for extra furniture. A dresser with a changing pad on top can function as both a storage unit and a changing station. Selecting multi-use furniture helps maximize space while keeping essential items within easy reach.

  1. Use Furniture with Built-in Storage

Many modern nursery furniture pieces come with built-in storage. A changing table with shelves or drawers beneath it provides a convenient place for diapers and wipes. Cribs with built-in drawers or baskets use under-crib space that would otherwise go unused. Investing in furniture that offers built-in storage helps reduce clutter and keeps everything organized.

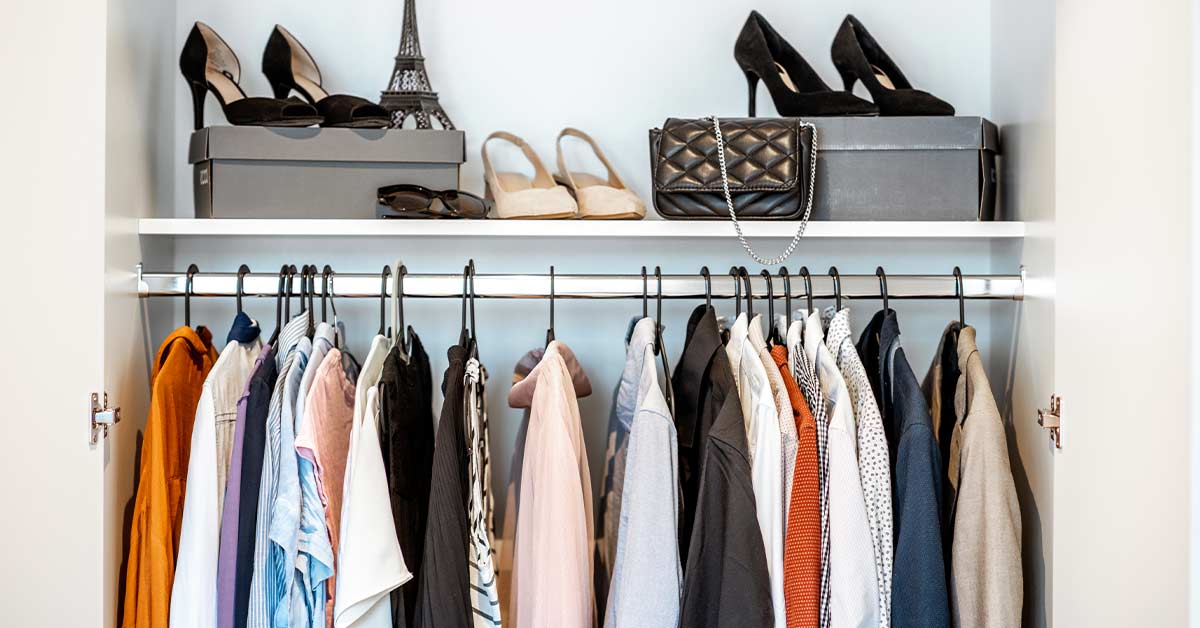
  1. Optimize Closet Space

Instead of using a nursery closet solely for hanging clothes, make better use of the space by removing closet doors and repurposing the area. Move a dresser inside the closet or use stacking baskets and bookshelves with bins to maximize storage. Since baby clothes are small, adding a second closet rod allows you to hang more items without taking up extra space. File-folding baby clothes in drawers can also help save space and keep items neatly arranged.

  1. Use Vertical Space

Think beyond floor space and take advantage of vertical storage solutions. Install floating shelves to store books, decor, or baby essentials. Hanging organizers, such as closet cubbies or back-of-the-door shoe organizers, are perfect for keeping diapers, wipes, and small accessories within easy reach. Toy hammocks can store stuffed animals while doubling as cute nursery decor. Pegboards with hooks and baskets provide additional vertical storage for a variety of baby items.

  1. Keep Storage Portable

Rolling carts and portable caddies offer a flexible way to store baby essentials without taking up permanent space. A rolling cart can serve as a mobile diaper station, breastfeeding station, or bath-time caddy that you can easily move and tuck away when not in use. This allows you to keep important items within reach while maintaining a tidy and uncluttered nursery.

  1. Declutter Regularly

Babies outgrow clothes and gear quickly, so it’s important to declutter your nursery regularly. Donate, sell, or store outgrown clothes and baby items to free up valuable space. If you plan to keep items for a future child, store them outside the nursery in labeled bins. Keep only the essentials in the nursery to maintain an organized and stress-free space.

Organizing a nursery in a small space may seem challenging, but with the right approach, you can create a functional and clutter-free environment. By choosing multi-functional furniture, using vertical space, and decluttering regularly, you can maximize your nursery room storage and keep everything organized for your little one.

Self Storage Tips for Traveling Nurses

Due to their nomadic lifestyle, traveling nurses face unique challenges. Moving from one assignment to another can be demanding, especially when managing personal belongings and figuring out temporary self storage solutions.

U-Lock Mini Storage offers a convenient and useful self storage unit solution for traveling nurses to store their belongings securely while relocating. We provide space for storing furniture, clothes, and other personal items, giving nurses peace of mind knowing their possessions are in good hands. Access to self storage options can help traveling nurses ease their transitions between assignments without carrying all their belongings with them.

Why a Self Storage Unit Is Useful for Traveling Nurses

One of the top reasons self storage is essential for traveling nurses is its flexibility. With unpredictable assignment durations and locations, having a secure place to store possessions provides peace of mind and convenience. U-Lock Mini Storage offers storage units in various sizes, allowing nurses to choose a space that fits their specific needs. Additionally, we offer storage unit rentals on a flexible month-to-month basis to cater to your lifestyle.

Our secure self storage facilities are equipped with security features such as surveillance cameras and gated access, ensuring valuable items are kept in a protected environment while nurses are on assignment. This added layer of security is especially important for healthcare professionals who carry sensitive equipment or personal items.

Another key benefit of self storage for traveling nurses is decluttering living spaces. By storing non-essential items in a storage unit, nurses can create a more organized and stress-free environment in their temporary accommodations. This can contribute to better mental well-being and a healthier work-life balance during demanding assignments.

How To Choose the Best Storage Unit for a Traveling Nurse

When choosing a self storage facility as a traveling nurse, it’s important to consider your unique lifestyle and needs. Look for storage facilities that offer convenient access, a variety of storage unit sizes, and flexibility in rental terms to accommodate your changing schedule.

Accessibility and Location

Look for facilities with extended access hours or 24/7 availability to accommodate your irregular work shifts and schedule. Proximity to major highways or public transportation hubs can also make reaching the facility easier when needed.

Finding the Right Storage Unit Size

Find a storage unit size that fits your travel nurse needs. With storage unit sizes ranging from 10×30 to 10×40, you’ll have all the space you need to store your belongings without overcrowding your unit.

Packing and Moving Tips for Traveling Nurses

Efficient packing and organization are essential for maximizing a self storage unit, especially for traveling nurses who are always on the move. By implementing space-saving hacks and innovative organizational strategies, you can keep your belongings easily accessible.

Label Everything

Proper labeling is essential for easy access to your belongings. Use clear, descriptive labels on all boxes and containers to quickly locate items without rummaging through everything.

Opt for Transparent Bins

Transparent storage bins allow you to see the contents without opening each box. This makes it easier to identify what’s inside and prevents unnecessary digging around.

Create an Inventory List

Create an inventory list or use a moving checklist app to help inventory your stored belongings so you can easily see what you’ve stored when needed.

Rent Your Traveling Nurse Self Storage Unit Today

If you’re a traveling nurse constantly moving from one assignment to another, you understand the challenges of managing your belongings while maintaining flexibility.

By renting a self storage unit with us, you can securely store your possessions during assignments without worrying about hauling them around or finding temporary accommodations. This lightens your load and provides peace of mind, knowing your belongings are stored away and easily accessible whenever needed. Rent your storage unit today!

6 Tips for Living Minimalistically

Let go of unnecessary things, clear your home, and clear your mind—minimalism is all about living simply. If you’re curious about adopting a minimalist lifestyle, this is a great starting point. By removing the clutter from your life and placing it in a self-storage unit, you can find peace without getting rid of everything at once. Storage facilities offer a way to detach from items without letting them go forever.

Minimalist Living: Simplify Your Space

Simplifying your home can help free your mind. Focus on keeping only the essentials and enjoy the beauty of organized, clutter-free spaces.

Tips for a Minimalist Lifestyle

  • Stay Organized: If you’re having trouble finding things, it might be time to reorganize and put the extra stuff in a storage unit.
  • Quality Over Quantity: More isn’t always better. Prioritize the quality of your belongings over the quantity.
  • Handle Duplicates: If you have two of something you don’t need, get rid of one. Only keep what you truly need or value. Or, store the extra in a storage unit for future use.
  • Live in the Moment: Don’t let material items distract you from what really matters, like your family or peace of mind.

Benefits of Owning Less

  • Economical: Fewer possessions mean spending less. Selling items you no longer need can also boost your savings.
  • Reduce Stress: A clutter-free space can calm your mind, while too much clutter can cause anxiety.
  • Easier Cleaning: Fewer items make it quicker and easier to keep your home tidy.
  • Keep Some, Store the Rest
  • Keep essential items and things you use regularly, like a bookshelf or guitar, in your home. For non-essential but valued items, a storage unit is the perfect solution. Store things like seasonal clothing, holiday decorations, or extra furniture safely in a self-storage unit for later use.

Hold Onto Your Treasured Items

Sentimental items that take up too much space at home can be safely stored in a climate-controlled storage unit. Keep things like pianos, scrapbooks, and awards protected and easily accessible, without cluttering your home.

Organize Your Storage Unit

Don’t let your storage unit become cluttered. Use storage bins and shelves to keep everything neat and easy to find, keeping your minimalist lifestyle on track.

Tips for Working from Home

Did you just start working from home? Whether it’s for a short time or your new full-time routine, working remotely can be fun! But staying productive at home can be tricky. Here are some simple tips to help you stay focused and make the most of your time at home:

Set a Schedule

Just like at the office, stick to regular work hours. Having a clear start and end time helps keep work and home life separate. If it’s hard to stick to a schedule, try using time-tracking apps.

Create a Work Space

If possible, set up a separate room as your office. If not, choose a spot that minimizes distractions and is comfortable for work.

Set Family Rules

Working from home might mean your new “coworkers” are your spouse, kids, or pets. To avoid interruptions, set some rules. For example, kids can ask for help with homework during a specific time, or you and your spouse can work in different rooms.

Take Breaks

Taking breaks is important. It helps you reset and refocus. Make sure you know your company’s break policy and use your break time fully.

Get Some Fresh Air

During breaks or lunch, step outside for some fresh air. Even a short walk or playing with your pet can refresh your mind and body.

Take Sick Days When Needed

If you’re not feeling well, don’t try to push through just because you’re at home. Rest and recover so you can get back to work feeling better.

Communicate Clearly

Stay in touch with your coworkers and clients regularly. Let them know when you’ve finished tasks or if you need to change a deadline. Since you can’t chat in person, it’s better to over-communicate when working remotely.

Switch Off After Work

Without a commute, it can be hard to know when to stop working. Create an end-of-day routine, like setting an alarm, walking the dog, or starting dinner, to help you transition out of work mode.

6 Great New Year’s Resolutions for Home Organization 

As the New Year approaches, many of us focus on resolutions like losing weight, getting fit, or eating healthier. While these are great goals for improving our well-being, what about setting a resolution that enhances our living space?

New Year’s resolutions can also include home organization goals. By focusing on decluttering and organizing your home, you can reduce stress and create a more satisfying living environment. Here are 6 effective home organization resolutions for the new year:

Define Clear Goals

Start with a clear goal for your home organization project. Whether it’s cleaning out the garage, transforming the basement into a playroom or gym, or simply organizing your kitchen, define what you want to achieve. Write down your goals and keep them visible to stay motivated. Once you set your goals, it’s time to commit and take action.

Start Small

Tackling your entire home at once can be overwhelming. Instead, start with a small area like a closet or a few shelves in the garage. Begin by addressing the larger items in those spaces. If you have tools or furniture you no longer use, consider selling them online. Working gradually through your home will make the task more manageable.

Involve the Whole Family

If you share your home with family members, make home organization a group effort. Encourage everyone to take responsibility for their own spaces, whether it’s a bedroom, bathroom, playroom, or garage. By involving the whole family, you’ll make the process more efficient and ensure everyone benefits from a more organized home.

Remove Duplicate Items

The kitchen is notorious for accumulating duplicate items like cookie sheets, saucepans, and mixing bowls. If you find yourself with multiples, consider donating the extras to a thrift store or hosting a garage sale. This principle can also apply to garages and sheds, which often store duplicate tools and other items. Keep only what you truly need and use.

Use Storage Solutions

Optimize your space with practical storage solutions. Install pegboards and hooks in the garage or basement for tools and other items. Use floating shelves in living areas to reduce clutter on surfaces. Rent a storage unit to store belongings for short- or long-term.

Hire a Professional Organizer

If organizing your home feels too daunting, consider hiring a professional organizer. They can provide an objective perspective and help you decide what to keep, what to discard, and how to best arrange your belongings. The goal is to reduce stress, so don’t hesitate to seek expert help if needed.

When planning your New Year’s home organization resolutions, U-Lock Mini Storage is here to make the process easier. Use our Space Estimator to determine the right storage unit size for your belongings. Whether you need to store items like artwork, clothing, furniture, or electronics, we offer storage units to keep them safe.

Smart Business Storage Solutions

Having a good way to store your business’s items is imperative. Whether you need to keep important documents, special equipment, or extra office furniture, how you store these items can affect your business’s success.

Here’s a simple guide on how to store your business items safely and effectively.

Essential Tips for Business Storage

Keep an Inventory

Track what you store in your unit. This helps you find items quickly later.

Consider Temperature Control

For items like electronics and furniture, a climate-controlled unit prevents damage from temperature and humidity changes.

Check Security

Choose self storage with good security features like cameras, secure locks, and controlled access.

Ensure Accessibility

Make sure you can easily get to your stored items. Organize them well, and consider a drive-up unit if you visit often.

How to Store Business Documents

Use Filing Cabinets and Boxes

Organize documents in labeled cabinets or boxes for easy access.

Digitize Documents

Scan and save documents digitally to save space. Backup these files in secure locations.

Temperature-Controlled Storage

Store important paper documents in a temperature-controlled self storage unit to protect them from moisture and temperature changes.

How to Store Equipment and Tools

Perform Regular Maintenance

Clean and maintain equipment before storing to prevent rust and damage.

Use Shelving and Racks

Store tools and equipment on shelves or racks. Keep a list of where everything is for easy retrieval.

Secure Environment

Store sensitive equipment in a climate-controlled unit to avoid damage, especially for electronic components.

How to Store Office Supplies and Furniture

Disassemble Furniture

Take apart furniture to save space and prevent damage. Keep small parts together.

Use Protective Coverings

Cover items with plastic wrap or other protective materials to prevent dust and scratches.

Use Vertical Storage

Store supplies and smaller furniture pieces vertically to save space. Avoid stacking items too high.

Rent Reliable Business Storage with U-Lock Mini Storage

When you need extra space for your business, U-Lock Mini Storage has you covered. We offer various storage unit sizes, temperature-controlled options, and top-notch security to keep your items safe and accessible. Please contact us for more information!

Tips for Storing Your Camera

Do you have a vintage camera from the 1920s or even the 1980s? Here are some simple tips to help you store and care for your cameras and film properly.

How to Store Cameras Properly

Analog Camera Storage

Whether you own a vintage camera from the 1920s or a 35mm camera from the 1990s, proper storage is crucial. Here are some steps to ensure your camera stays in great shape:

  1. Use a Camera Case
  • Hard Case: Offers the best protection from bumps and drops.
  • Soft Case: Still good, but handled with care.
  1. Remove Batteries

Before storing, take out the batteries from your camera and equipment (like light meters and flashes) to prevent leaks.

  1. Choose a Climate-Controlled Location

Avoid places with extreme temperatures like garages or cars. Instead, use a closet at home or a climate-controlled storage unit.

Analog Camera Care

  • Keep It Dry: Moisture can cause fungus on your lens. Use silica gel packets to absorb humidity.
  • Protect the Lens: Always keep lens caps on and clean with a lens cleaning kit.
  • Regular Maintenance: Periodically take the camera out, click the shutter, and turn the knobs to keep it in working order.

Film Storage

Proper Film Storage

Storing film correctly ensures it remains in good condition:

  1. Refrigerate Your Film
  • Short-term Storage: Keep at 10°C or lower.
  • Long-term Storage: Store at -17°C or lower.
  1. Test Before Use

If film is stored for over six months, test it to make sure it’s still good.

  1. Thaw Before Use

Allow the film to reach room temperature before using. For example, a 100-foot roll of 16mm film takes about 30 minutes to thaw.

Taking the time to store and care for your analog camera and film properly will keep them in great condition, allowing you to enjoy your photography for many years. Consider using a temperature-controlled storage unit for the best results.

How to Properly Store Cardboard Boxes

Cardboard boxes come in different shapes and sizes and are often used for moving or self storage because they’re economical and easy to find. However, storing these boxes long-term requires some know-how. Here’s a guide on when to use cardboard boxes and how to store them properly.

The Basics of Storing Cardboard Boxes

Cardboard boxes are great for moving, but they aren’t the best for long-term storage. After moving, it’s common to leave items in cardboard boxes and put them in storage areas like the garage, attic, basement, or shed. However, unpacking your items and storing them properly is often a better choice.

Why Cardboard Boxes Aren’t Ideal for Long-Term Storage

  • Quick Deterioration: Cardboard breaks down faster than plastic and is affected by heat and humidity.
  • Pest Attraction: Bugs are drawn to cardboard and can damage both the boxes and their contents.
  • Moisture Damage: If stored on a concrete floor or in a damp area, cardboard can absorb moisture, leading to mold and mildew, and compromising the integrity of the boxes.

How to Store Cardboard Boxes Correctly

Maintain Your Storage Area

  • Keep boxes off the ground by using shelves.
  • Don’t stack boxes too high, and place heavier items at the bottom.

Use Self Storage

  • If possible, choose a storage unit. This helps regulate temperature and humidity, preserving your cardboard boxes longer.

Opt for Indoor Storage

Consider storing boxes in areas with wooden floors, like an attic or indoor self-storage unit, to prevent moisture absorption from the ground.

When to Use Plastic Totes Instead

For better long-term storage, plastic totes are often a safer bet. They resist moisture, don’t break down as quickly, and protect against insects. Here’s why plastic might be a better choice:

  • Durability: Plastic totes are sturdy and stackable.
  • Moisture Resistance: Sealed plastic boxes keep out moisture, protecting your items.
  • Insect Protection: Bugs are less likely to get into plastic containers.
  • Organization: Clear plastic totes allow you to see what’s inside, and colored lids can help you organize by theme (e.g., green for Christmas items, red for Valentine’s Day).

When deciding whether to use cardboard boxes or plastic totes for long-term storage, consider the environment of your storage area. For damp or pest-prone areas, plastic totes are the safer choice. If you need quality storage boxes, visit a U-Lock Mini Storage location for a variety of sizes. And if you need extra space, consider renting a storage unit at one of our U-Lock Mini Storage for reliable storage solutions.

5 Simple Tips for Storing Your Couch

Storing your couch properly can keep it in great condition for years. Follow these easy tips to ensure your furniture stays safe and sound in storage.

Clean Your Couch Thoroughly

We use our couches for everything – sitting, sleeping, eating, and even as a pet bed. Before storing it, make sure to clean it well to prevent mold, dust, and damage.

  • Fabric Sofas: Check if your upholstery needs a water-based or solvent-based cleaner. Generally, natural fibers like cotton shouldn’t be cleaned with water, while synthetic fibers can handle it. This helps extend the life of your couch.
  • Leather Sofas: Use a few drops of olive oil on a microfiber cloth to clean and condition the leather. Rub it in a circular motion.
  • Important: Ensure the couch is completely dry before putting it in storage.

Choose the Right Storage Unit Size

Picking the right storage unit is crucial. Too small a unit can damage your couch.

  • Measure your couch’s length, width, and height.
  • For small to medium-sized couches (like loveseats or standard three-seaters), a 5×10 ft or 5×15 ft unit is usually enough.
  • For larger couches or sectionals, consider at least a 10×10 ft unit. You might need a 10×15 ft or 10×20 ft unit for extra space.
  • Tip: Remember to account for protective padding and extra room for moving furniture.

Protect Your Couch During Storage

  • Before Storage: Disassemble parts of the couch if possible to avoid damage during transport. Keep screws, washers, and legs together in a bag.
  • During Storage: Cover the couch with sheets or drop cloths to protect it from dust and moisture. Avoid using plastic covers, as they can trap moisture and cause mold.

Use Temperature-Controlled Storage

Couches are designed to last indoors, not in garages or sheds. Temperature-controlled storage units can keep the temperature and humidity levels stable, protecting your couch from moisture, extreme temperatures, and humidity.

Keep Your Couch Off the Ground

Even in secure storage units, accidents like flooding or spills can happen. Elevate your couch using pallets, bricks, or a tarp to avoid potential damage from water or dirt.

Taking these steps will help ensure your couch remains clean and in good shape while in storage. It may take some effort, but your favorite sofa will be ready and waiting for you when you need it again.

9 Tips to Organize Your Closet

Struggling with a chaotic closet every morning can start your day on a stressful note. If you’re navigating through a sea of unworn or out-of-season clothes just to find an outfit, it’s time for a change. Cleaning out your closet might seem daunting, but it’s a rewarding task that can simplify your life and bring peace to your mornings. Here’s a guide to decluttering and organizing your closet, ensuring you have a simple process for dressing up every day.

  1. Preparation is Key

Start with gathering the essentials to make the organization process smoother. You’ll need rags, a cleaning solution (mix 3 cups of warm water with a tablespoon of dish soap), a vacuum, a dust mask, trash bags, three bins or laundry baskets, matching hangers, and a marker or pen with paper and tape. Consider adding hooks and pocket organizers for your accessories.

  1. Empty Your Closet Completely

To truly tackle every inch of your closet, you need to start with a blank canvas. Remove everything from your closet. Wearing a dust mask during this process is a smart move, especially if it’s been a while since the last clean-out. You’ll likely uncover a surprising amount of dust.

  1. Deep Clean All Surfaces

With everything out of the closet, take the opportunity to thoroughly clean the interior. Wipe down walls and shelves with your cleaning solution, then vacuum or sweep and mop the floor if you have hardwood.

  1. Sort with Purpose

Create three categories for sorting: keep, wash, and donate. As you sift through your belongings, be honest about what fits, what matches your current style, and what you’ve actually worn in the past year. Everything else can find a new home.

  1. Rent a Storage Unit

Look for underutilized areas in your closet for additional storage. Use hooks, over-the-door organizers, and even shower curtain rings for scarves to keep accessories organized. Don’t be afraid to look outside the closet for self storage solutions if space is tight. Consider renting a self storage unit to store your belongings for short-term or long-term.

  1. Tackle the Laundry

With your closet empty, you might find a pile of items that need washing. Aim to address this pile within 24 hours to keep the momentum going and avoid clutter from creeping back.

  1. Donate Generously

Take your donation pile and get it ready to leave your home. Whether you choose a charity or someone in need, make sure these items are out of your house quickly to avoid second-guessing your decisions.

  1. Use a Daily Clothing Chart

Keep a log of your daily outfits to encourage creativity and track what you actually wear. This can highlight pieces you consistently overlook and may need to part with.

  1. Maintain the Order

Commit to regular closet audits and cleaning, ideally with the changing seasons. This will not only keep your closet organized but also ensure it stays manageable year-round.

How often should you do it? Try to do a seasonal clean-out, about four times a year, to keep everything in check and adapt to changing weather and style preferences.

Engaging in a closet clean-out might initially seem like a big task, but the peace and simplicity it brings to your daily routine are immeasurable. Not only will your mornings run smoother, but you’ll also have a clearer idea of what your wardrobe actually needs, saving you from future shopping mishaps. Happy organizing!