5 Essential Tips for Safely Storing Furniture in Self-Storage

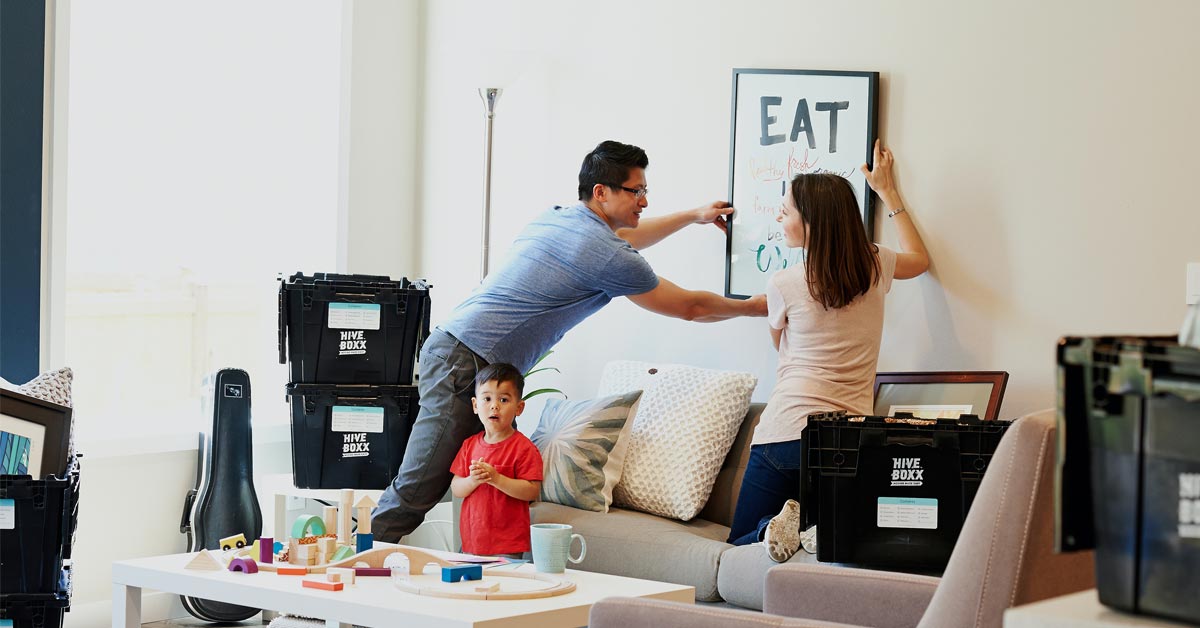
Are you in need of extra space to store your furniture? Self-storage units are a popular option, providing a convenient and secure solution. However, storing furniture requires careful consideration to ensure it remains in good condition while in storage. To help you make the most of your self-storage space, here are 5 essential tips for safely storing furniture.

Clean and Prepare Your Furniture

Before storing your furniture, it’s important to clean and prepare it properly. Dust and debris can accumulate over time, leading to damage or even mold growth. Clean your furniture thoroughly, removing any dirt, dust, or stains. Consider using furniture polish to protect the surfaces and keep them in good condition during storage.

Disassemble any furniture that can be taken apart, such as beds, tables, and chairs. Keep all the screws, bolts, and other small parts in a labeled bag to avoid losing them. Taking apart furniture can help save space in your storage unit and prevent any unnecessary stress on the furniture during transport.

Use Proper Protection

To protect your furniture from dust, moisture, and other potential damage, it’s crucial to use appropriate protection. Consider covering your furniture with plastic or cloth covers to shield it from dust and debris. Avoid using plastic sheets directly on wood furniture, as it can trap moisture and lead to condensation, which can cause damage over time. Instead, opt for cloth covers or use breathable furniture covers designed specifically for storage.

For delicate or valuable furniture, such as antiques or leather upholstery, consider using additional protective measures such as bubble wrap, foam padding, or furniture blankets. These extra precautions can prevent scratches, dents, and other damage while in storage.

Choose the Right Storage Unit

Selecting the right storage unit is crucial for the safety of your furniture. Consider the size of the unit and choose one that provides enough space for your furniture without overcrowding. Avoid placing furniture in a unit that is too small, as it can cause damage due to limited airflow or overcrowding.

Opt for a climate-controlled storage unit if possible, especially if you’re storing furniture for an extended period. Climate-controlled units help regulate temperature and humidity levels, providing an ideal environment for furniture storage. Extreme temperature fluctuations and high humidity levels can cause warping, cracking, and other damage to furniture. Additionally, choose a storage unit with proper security measures, such as surveillance cameras, gated access, and well-lit areas, to ensure the safety of your furniture.

Properly Arrange and Stack Furniture

How you arrange and stack your furniture in the storage unit can impact its safety and condition. Place heavier and sturdier items at the bottom to provide a stable base. Avoid stacking heavy items on top of delicate or valuable furniture to prevent crushing or damage.

Leave space between furniture items and the walls of the storage unit to allow for proper air circulation. Avoid placing furniture directly on the floor; instead, use pallets or boards to elevate it and protect it from potential moisture on the floor.

Label your furniture items and create an inventory list to help you locate them easily when needed. Keep a layout plan of your storage unit to make it easier to retrieve specific furniture items without having to move everything around.

Regularly Check and Maintain Your Furniture

Even when stored properly, furniture can still be subject to damage over time. Therefore, it’s essential to regularly check and maintain your furniture in self-storage. Visit your storage unit periodically and inspect your furniture for any signs of damage, such as mold, pests, or water damage. If you notice any issues, address them promptly to prevent further damage.

Moving into a New House? Here’s Your Essential Cleaning Checklist

Moving into a new house is an exciting milestone in life. As you embark on this new chapter, it’s important to ensure that your new home is clean and ready for you to settle in. Cleaning a new house may feel overwhelming, but with the right checklist in hand, you can tackle the task efficiently. In this blog post, we’ll provide you with an essential cleaning checklist to make your new house sparkling clean and inviting. Let’s get started!

Start with a Plan

Before you dive into cleaning, take a moment to create a plan of action. Assess the different areas of your house and prioritize the tasks that require immediate attention. Breaking down the cleaning process room by room will help you stay organized and focused. You can also consider renting a self storage unit while you draft up a plan so that you have additional space to store your belongings when you’re cleaning your home.

Gather Your Cleaning Supplies

Make sure you have all the necessary cleaning supplies before you begin. Stock up on essentials such as all-purpose cleaners, disinfectants, glass cleaners, microfiber cloths, mops, brooms, and vacuum cleaners. Having these supplies readily available will save you time and ensure an effective cleaning process.

Clean from Top to Bottom

Adopt a top-to-bottom cleaning approach to prevent dust and dirt from resettling. Start by dusting ceiling fans, light fixtures, and shelves. Then, wipe down walls, windowsills, and baseboards. Finally, vacuum or mop the floors to leave them sparkling clean.

Pay Attention to Kitchen and Appliances

The kitchen is often the heart of the home, so it’s crucial to give it extra attention. Clean the inside and outside of cabinets and drawers, removing any debris or dust. Thoroughly scrub countertops, sinks, and faucets. Clean appliances such as the oven, refrigerator, and dishwasher, ensuring they are ready for use.

Refresh Bathrooms

Bathrooms should be thoroughly cleaned to ensure a hygienic and fresh environment. Clean the toilet, bathtub, shower, and sink, using appropriate disinfectants. Don’t forget to wipe down mirrors, cabinets, and countertops. Replace shower curtains and liners if necessary.

Tackle Bedrooms and Living Areas

In bedrooms and living areas, focus on dusting furniture, vacuuming upholstery, and cleaning windows and mirrors. Launder or dry clean curtains and wash bedding to ensure a clean and cozy sleep environment.

Don’t Forget the Exterior

If your new house has an outdoor area, don’t neglect it! Sweep porches, patios, and decks, and remove any debris or cobwebs. Clean windows from the outside to let natural light flood into your home.

Final Touches

After completing the essential cleaning tasks, add final touches to make your new house feel like home. Light scented candles, use air fresheners, or open windows to let in fresh air. Place fresh flowers or potted plants to add a touch of nature and vibrancy.

Moving into a new house is an exciting adventure, and a clean and fresh space sets the stage for a positive start. By following this essential cleaning checklist, you can ensure that your new home is welcoming and comfortable. Remember to plan your cleaning process, gather the necessary supplies, clean from top to bottom, pay special attention to the kitchen and bathrooms, refresh bedrooms and living areas, tend to the exterior, and add final touches. With a little effort and a systematic approach, your new house will soon become a clean and inviting haven for you and your loved ones. Happy cleaning and congratulations on your new home!

Preserving Memories: How to Store Your Photos and the Benefits of Renting a Storage Unit

Photos are cherished memories that capture moments we want to cherish forever. From family vacations to special events, these precious moments are often captured in the form of photographs. However, with the rise of digital photography, we have more photos than ever before, and finding adequate storage solutions for our physical and digital photos has become essential. In this blog post, we will explore different ways to store your photos, and we will also delve into the benefits of renting a storage unit for your cherished memories.

Organize and Digitize Your Photos

The first step in storing your photos is to organize and digitize them. Sorting through your photos, discarding duplicates or blurry shots, and organizing them into categories such as events, people, or years can help you easily locate and access your photos in the future. Additionally, digitizing your photos by scanning them or using a photo scanning service can help protect them from physical damage, such as fading or deterioration over time.

Use Acid-Free Storage Supplies

When it comes to physical photo storage, it’s crucial to use acid-free supplies. Acid-free albums, photo sleeves, and boxes are designed to prevent acid from damaging your photos, which can lead to yellowing or discoloration. Look for archival-quality materials that are specifically designed for photo storage to ensure the longevity of your cherished memories.

Create Backup Copies

Another essential step in preserving your photos is to create backup copies. Whether you have physical or digital photos, having multiple copies stored in different locations can help safeguard against loss or damage. For digital photos, consider using cloud-based storage options or external hard drives for backup. For physical photos, consider keeping duplicates in separate locations or with trusted family members.

Consider Renting a Storage Unit

Renting a storage unit can be a practical and convenient solution for storing your cherished photos. Storage units are designed to provide secure, climate-controlled environments that protect your belongings from environmental factors such as temperature fluctuations, humidity, and dust. They are also equipped with advanced security measures such as surveillance cameras, access control systems, and on-site personnel, ensuring the safety of your valuable photos.

Here are some benefits of renting a storage unit for your photos:

a) More Space: If you have a large collection of physical photos or albums that are taking up space in your home, renting a storage unit can free up valuable space in your living area, keeping your home organized and clutter-free.

b) Protection from Environmental Factors: Storing your photos in a storage unit with climate control can help protect them from damaging factors like extreme temperatures, high humidity, or pests, which can cause irreparable damage to your cherished memories.

c) Enhanced Security: Storage units are equipped with advanced security measures such as surveillance cameras, access control systems, and on-site personnel, providing an extra layer of protection for your valuable photos.

d) Privacy: Renting a storage unit can provide you with privacy for your photos, especially if you have sensitive or personal photos that you prefer to keep secure and confidential.

e) Accessibility: Most storage units offer flexible access hours, allowing you to retrieve your photos whenever you need them. This can be especially beneficial if you have photos that you rarely access but want to keep safe for future generations.